Givi Luggage Racks for Explorer


Here we go again. Yes, new bike means new racks (to see the process we used for the Tiger 900, refer to the other Give Luggage Rack story). The help we got in picking out the racks and where we got them, etc. is the same old story (keep in mind that if you do not mind waiting 7-14 days, purchasing overseas saved over $200 after paying the $50 shipping).
The instructions they give are all pictures still (no text). This is the third set of racks I have installed so experience does pay off (but there were still a few surprises). I would save the top plate for last. It is VERY easy.
To start, you will need to remove the rear foot pegs.
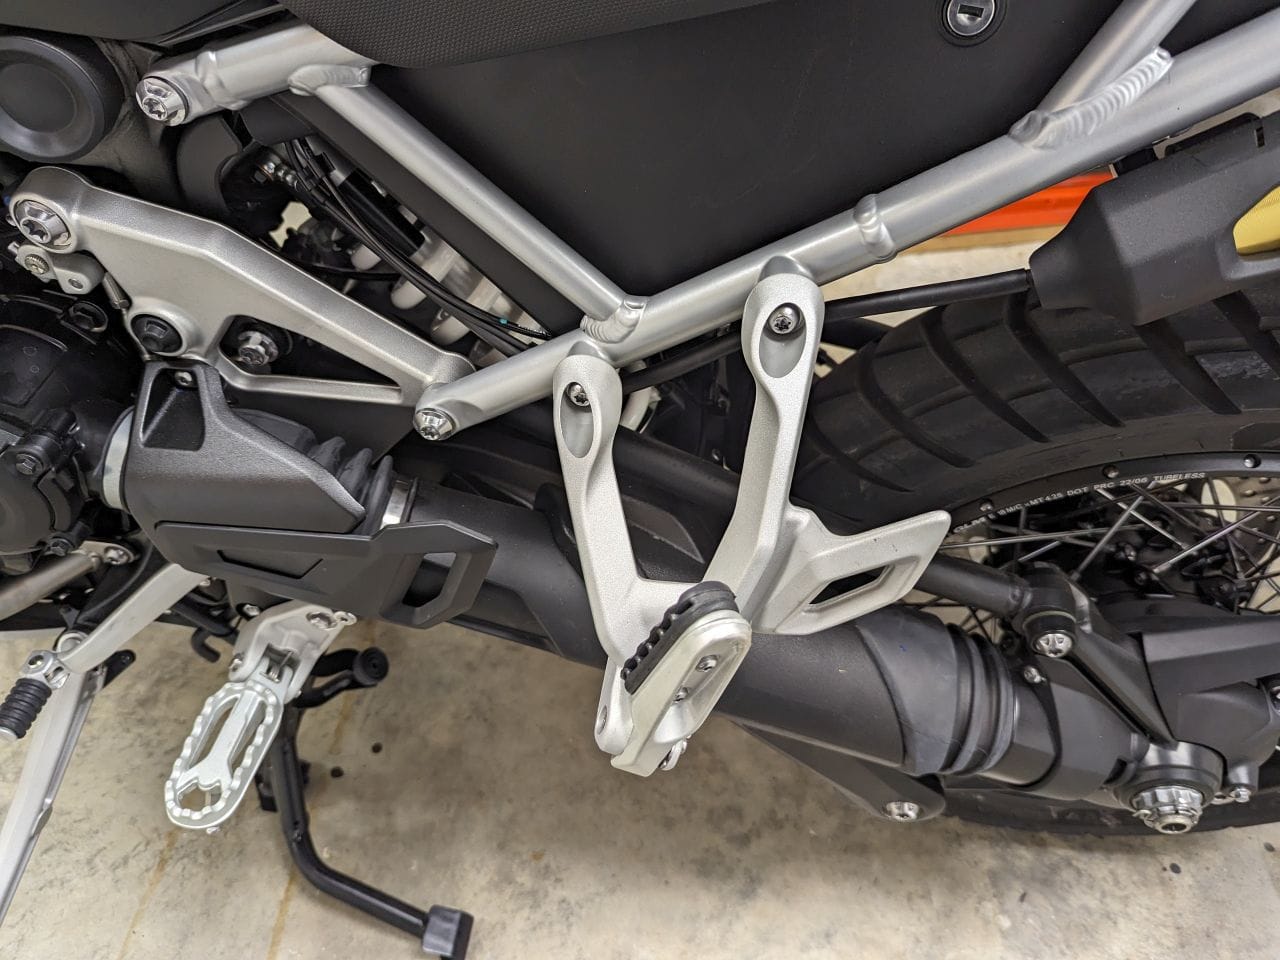
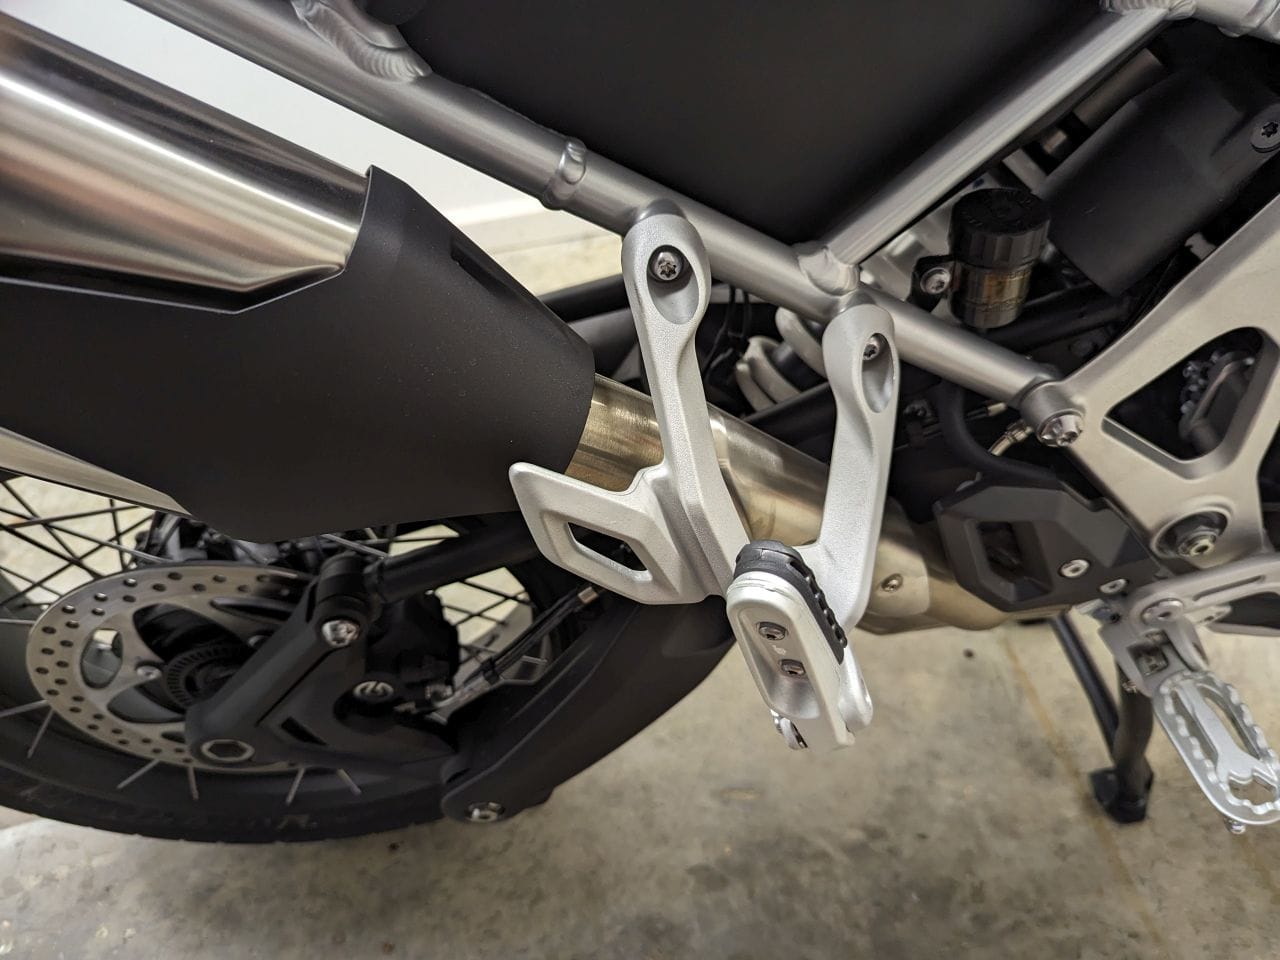
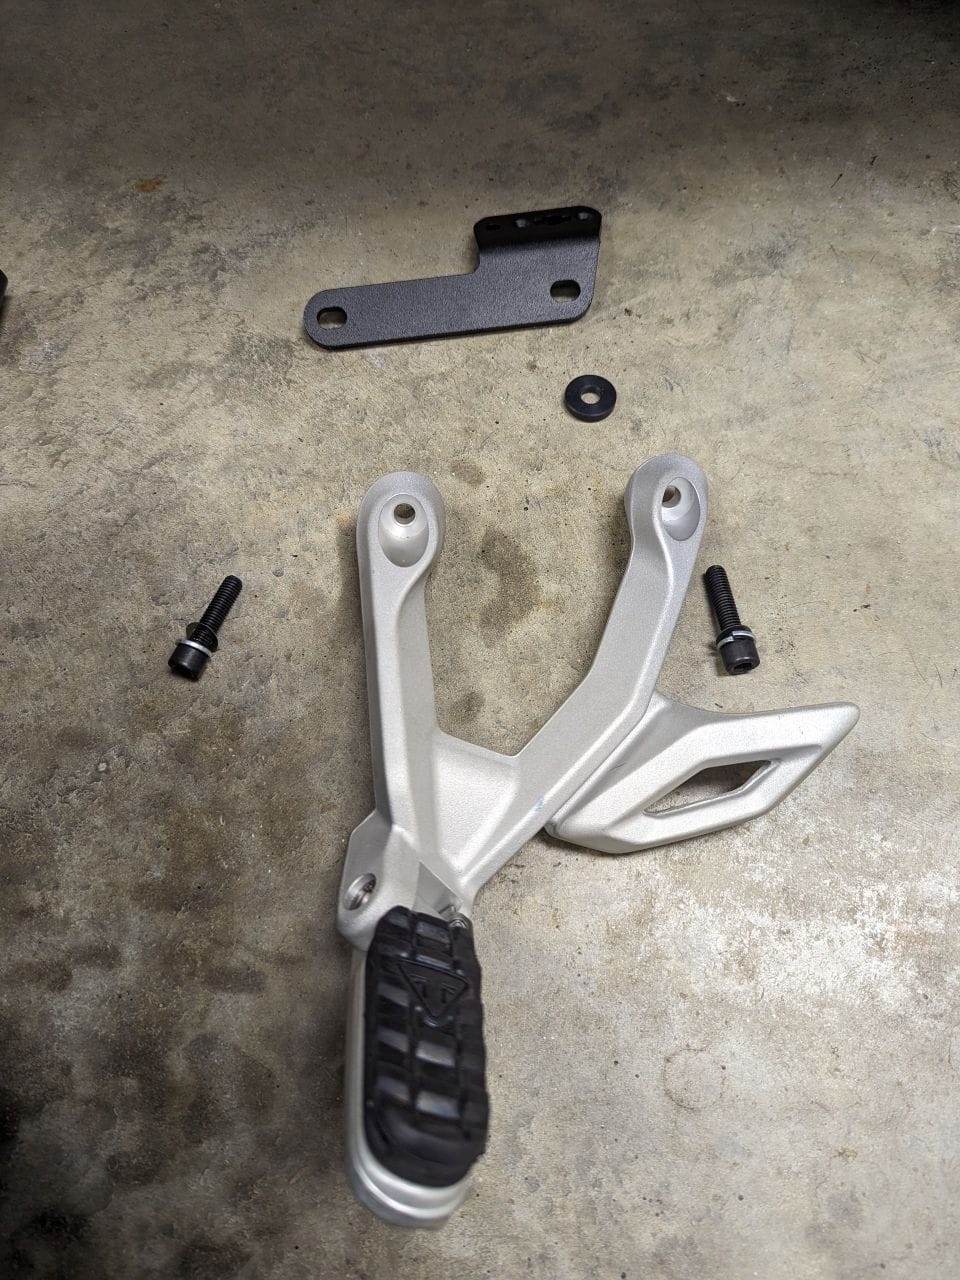
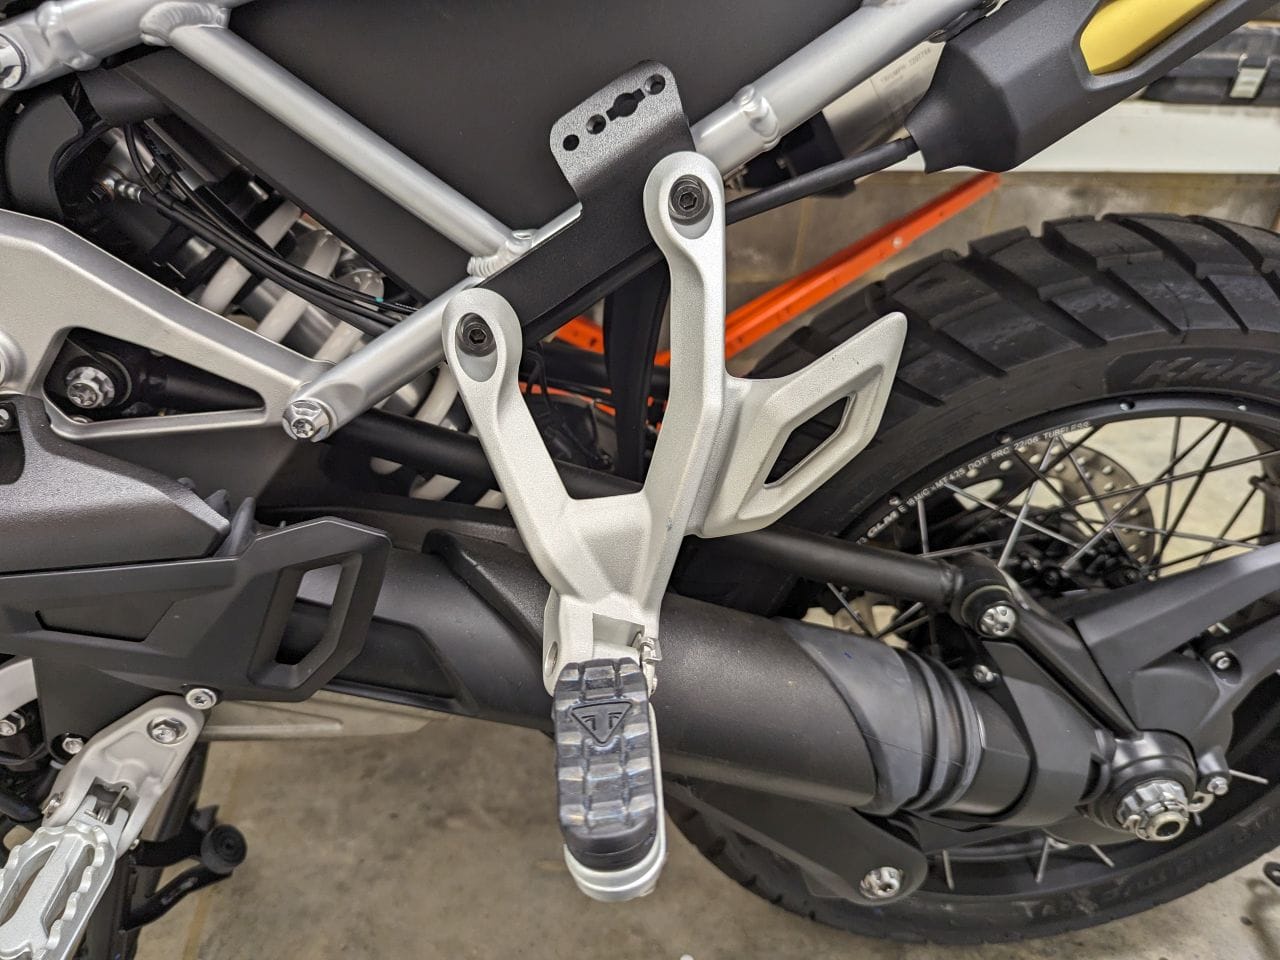
Rear foot peg plate installation
Using a Torx head bit, just take out the two bolts. Be careful as the bolt near the rear tire has a black washer (the front bolt does NOT). Looking at the picture, you can see that the large part of the flange goes to the rear and bends inward. That black washer goes in-between the new Givi plate and the foot peg. Do not put it behind the Givi plate. Go ahead and tighten the foot peg bolts to spec. Leaving this piece loose during installation does not really help.
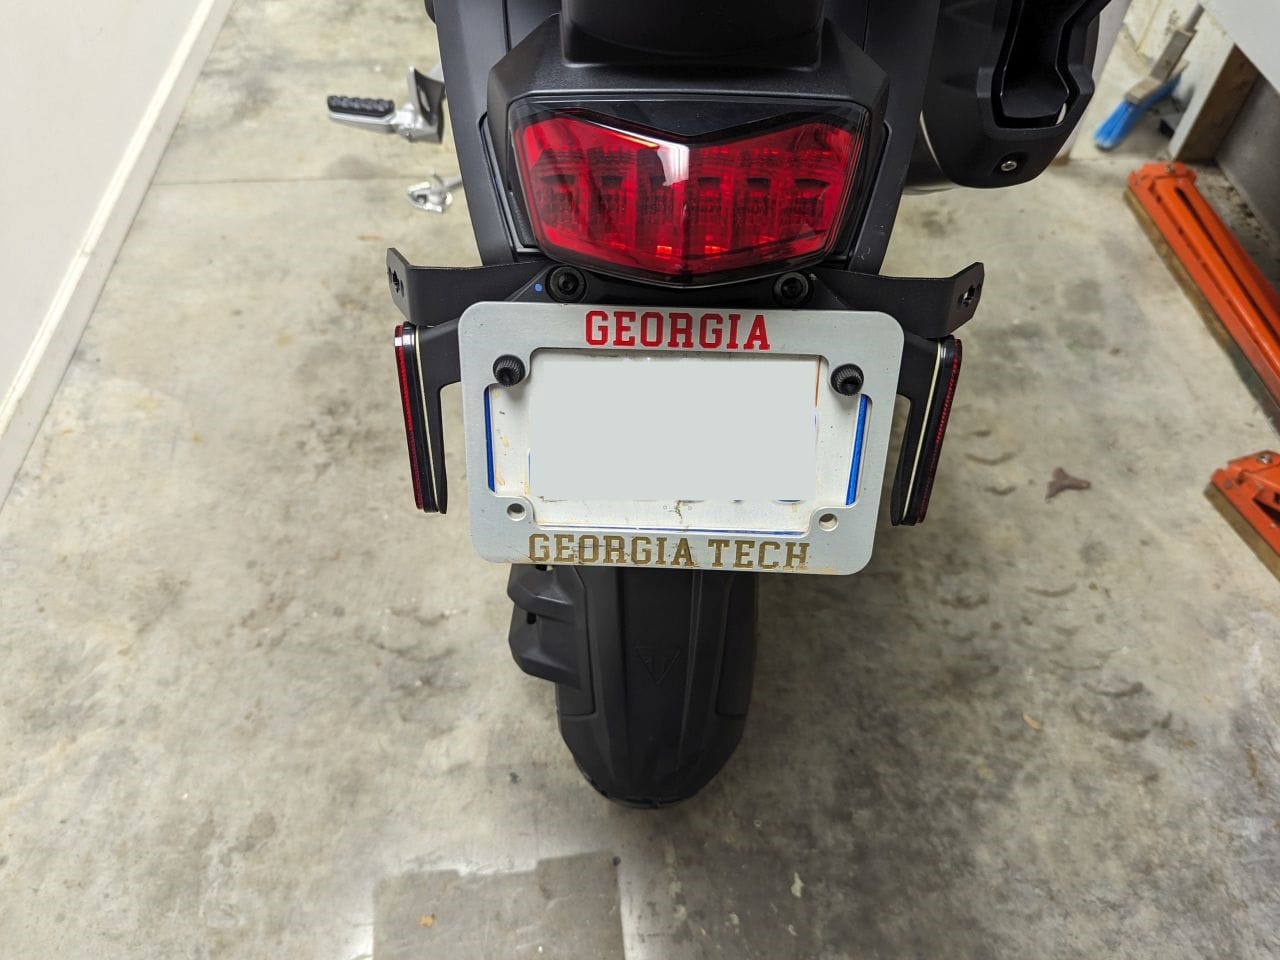
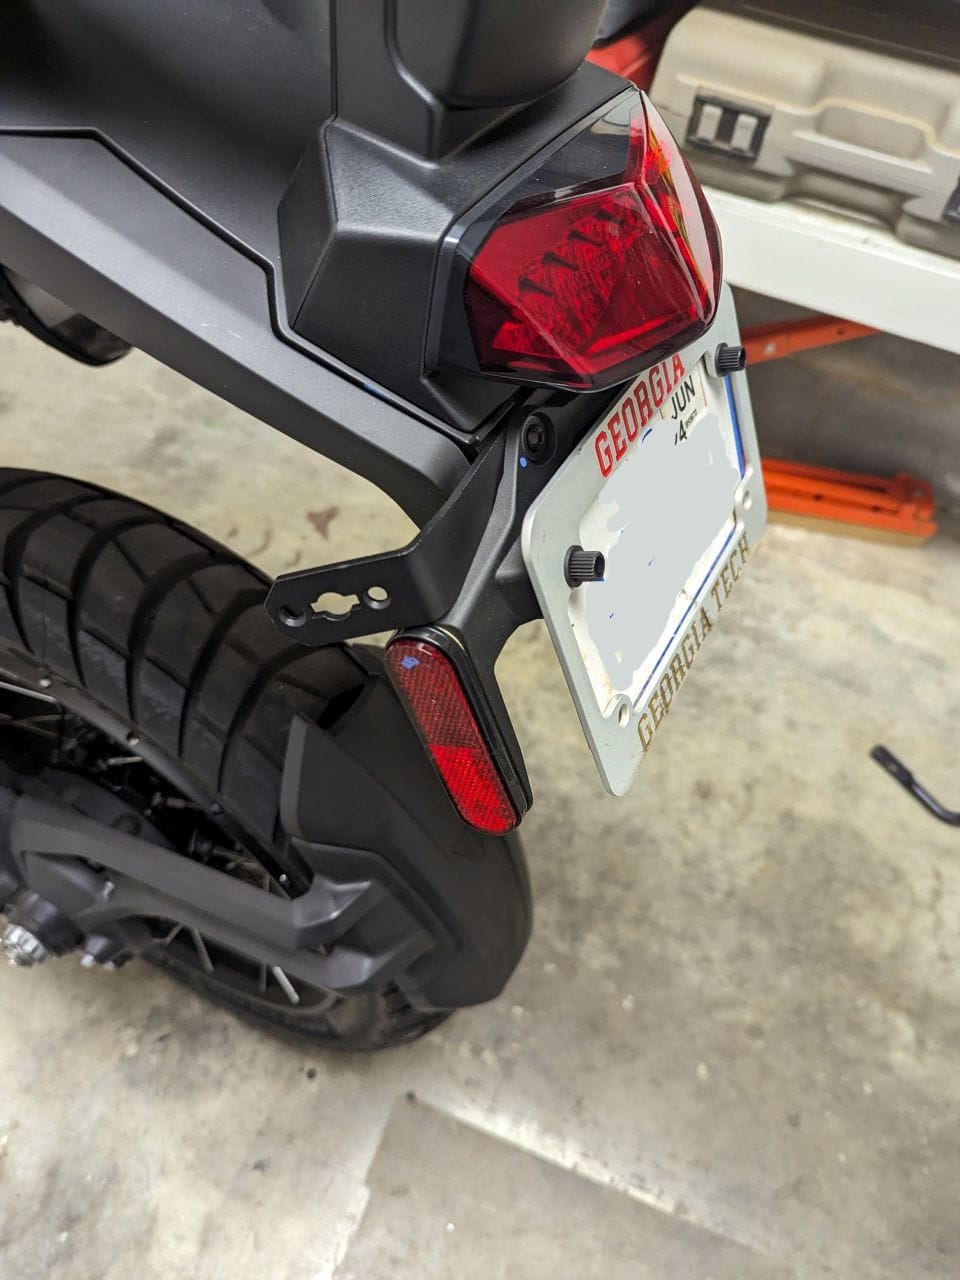
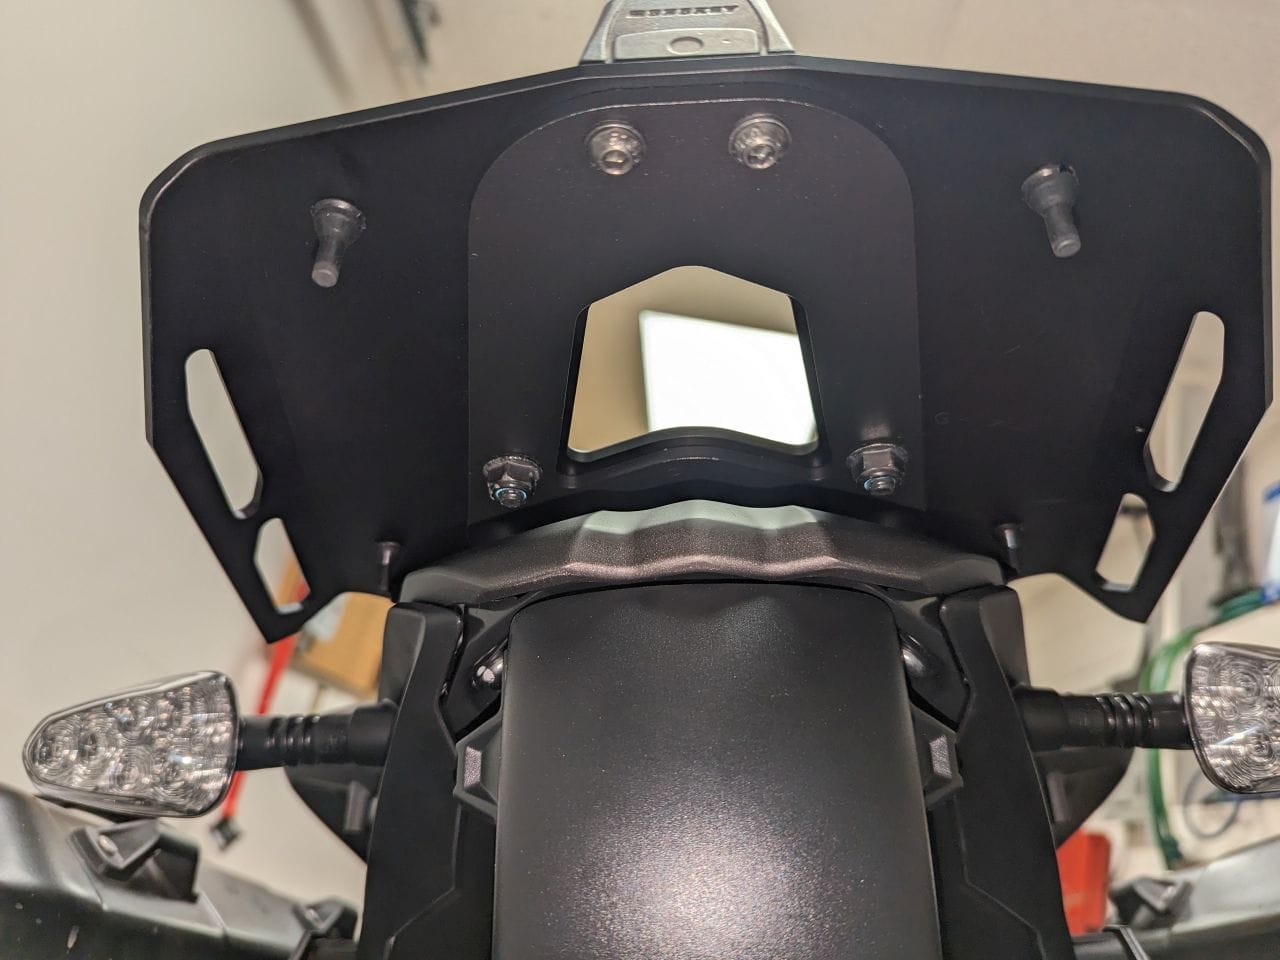
Next up is the plate behind the license plate. FYI, it fits ok but is awkward. Remove the license plate assembly from the bike. It is two screws at the top and one at the bottom attached to the bottom reflector from the underside. It is easier if you remove the actual license plate first then the assembly from the bike.
There are two pieces that need to be attached to the rear of the bike: the Givi plate and the license plate assembly you just took off. Here is the awkward part. You need to attach your license plate to the original license plate assembly. You will not have access to the nuts if you attach it first. The other problem is that you need also install the bottom screw of the Givi plate to the motorcycle since it is behind the license plate.
The process I followed was to install the bottom screw first. I did not tighten it all the way but just enough so the Givi plate can move around. Next, I installed the two top bolts through the license plate assembly and the Give plate. Tighten the top bolts to spec. You should have enough space to also tighten the bottom bolt as well. The last thing to do is install the last screw for the bottom reflector (I left off the reflector). This will help pull the license plate assembly tighter to the bike so it will not flop around. It sounds harder than it is and I do not have pics for each of these steps. The license plate assembly will bend a bit to the new Givi plate as it is not a perfect fit but it will all work out fine.
Rear Givi plate installation
If you look, you can see that the license plate assembly bends a bit and that the side reflectors are kind of in the way. Maybe this assembly is slightly different that the European version. I am not sure but it mounts securely.
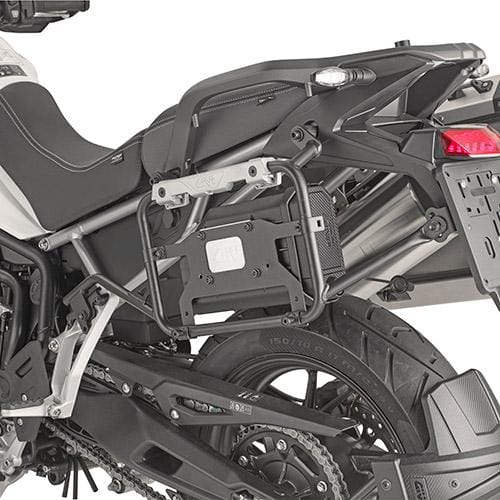
The last step is the side rack installation. I started on the kickstand side. You will see the two bolts that need to be removed.
Side rack bolt removal
Now comes the fun part - installing the new racks. There are two bolts and notice the the rearward bolt is SHORTER. I would also start with the rearward bolt as it is easier (the front bolt you need to hold the rack, bolt, spacer, washers, etc WHILE lifting the hand rail to line up the holes). Line up the bolt and hand start the bolt. It should screw in easily. Do not screw it in all the way. Halfway for now should do it. Once that bolt is in place, the rack will not fall off the bike.
Next, so the same to the front bolt. This time you will need to lift up on the hand rail to line up the holes. Again, hand start the bolt until it is about half way inserted. Once both those bolts are in, go ahead and attach both the foot peg bolt and the license plate bolts. With the rack really loose, these should not be a problem.
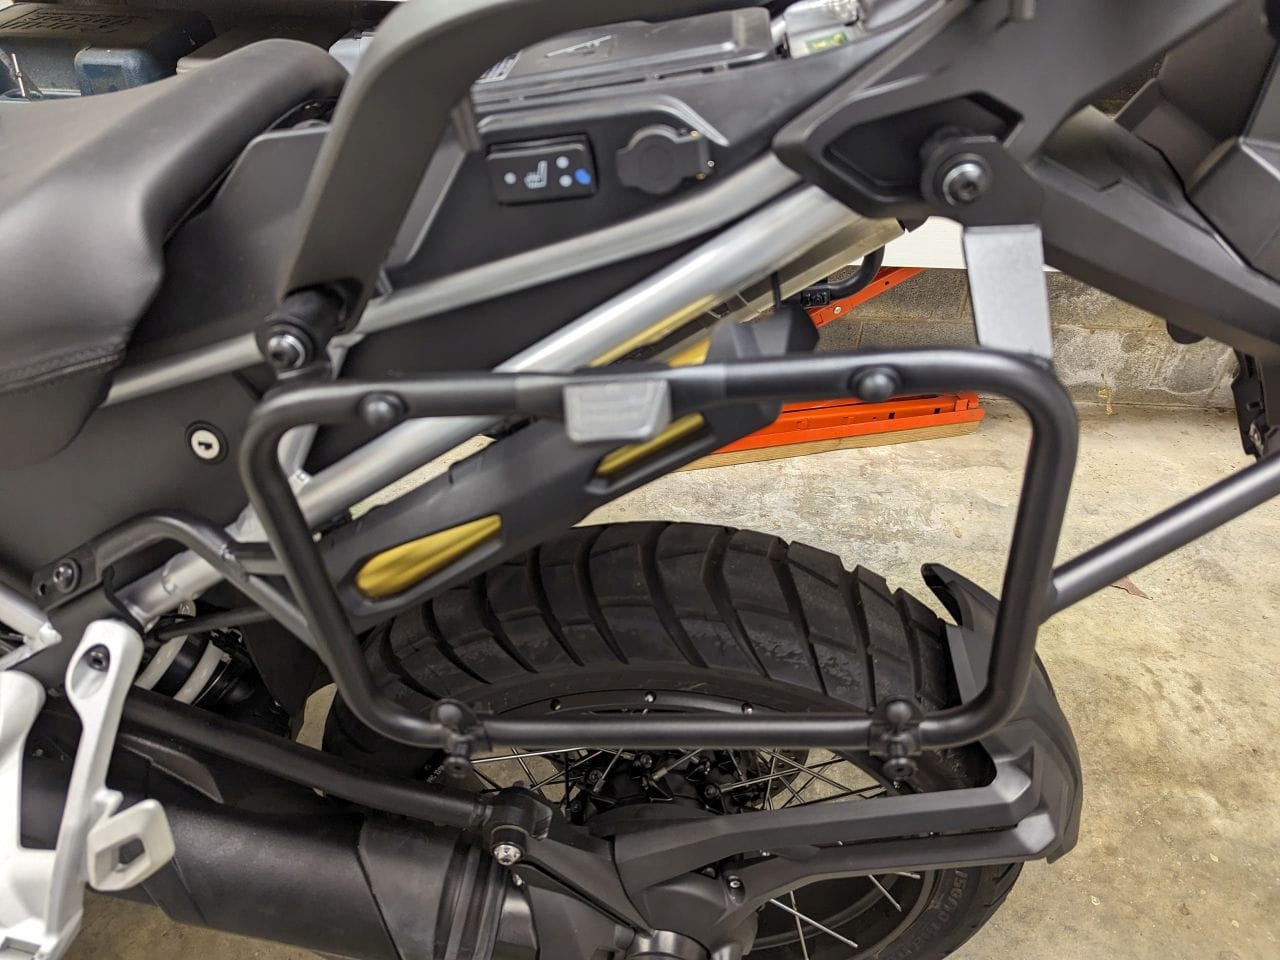
Now you need to do the same for the other side. Be aware that the muffler gets in the way of the rearward bolt. You will need to compress the rubber grommet in order to line up the hole. Just like before, hand start the bolt about half way in. Once that is in place, do the front bolt, then the foot peg and then the rear bolt to the license plate. It will take a bit of compressing to get all the bolts in place (hence why we keep everything loose).
Once all the bolts are in place, tighten the upper bolts first to spec. Once those are complete, do the foot pegs and then the rear license plate. Once all tightened, you are ready for your bags.
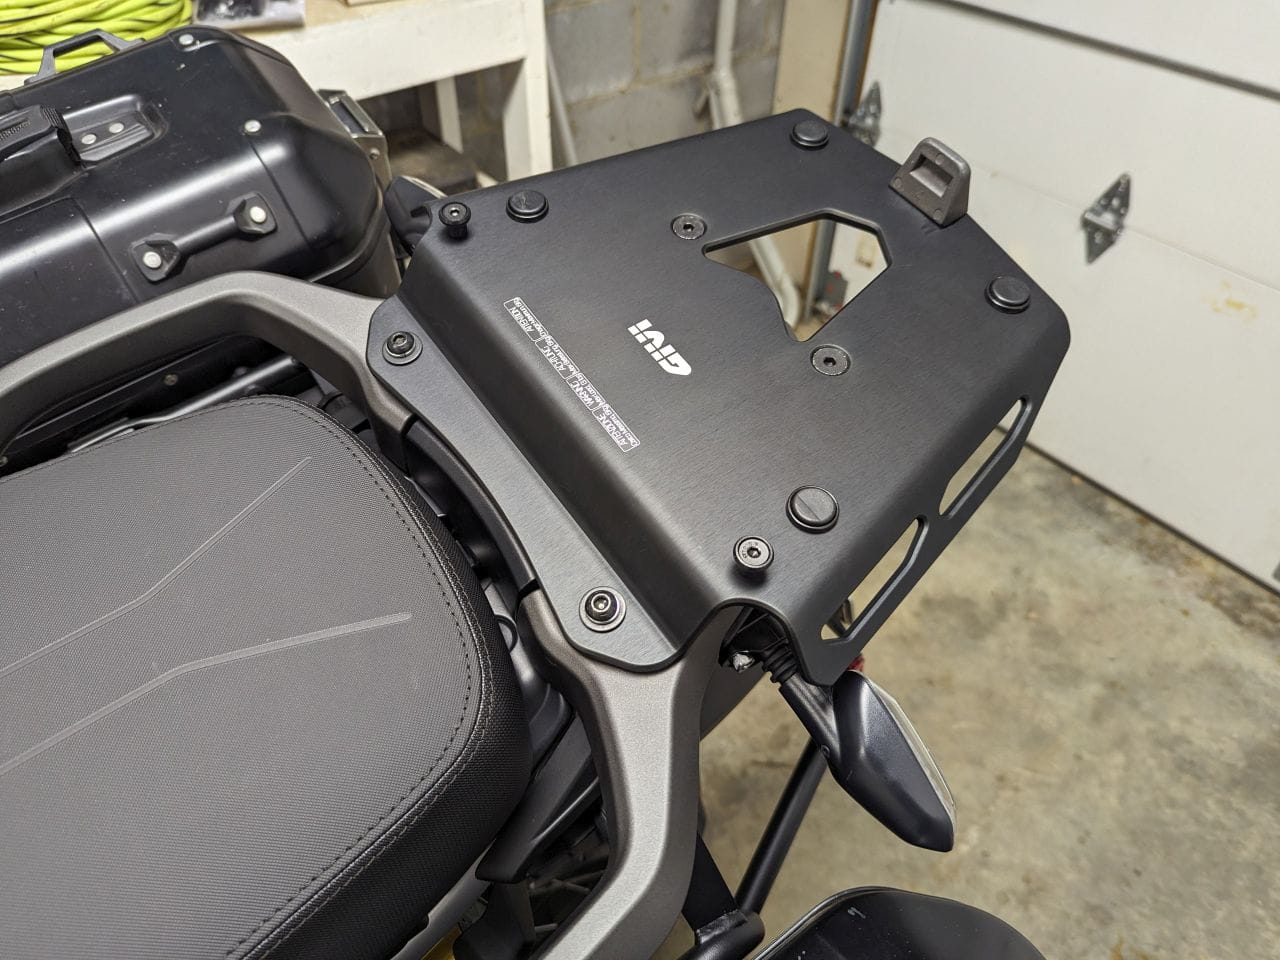
The final installation is the top plate. This is so easy. There are two plates. You remove the first set of bolts and replace them attached to the smaller plate. Tighten these to spec. For the top plate, do the exact same thing but with the other set of bolts. Now there is a set of screws to attach the two plates together. And finally attach the knob/latch. It takes about 5 minutes to complete the entire process.
Give rear plate
Now that you have everything installed and tightened, pop on your bags.
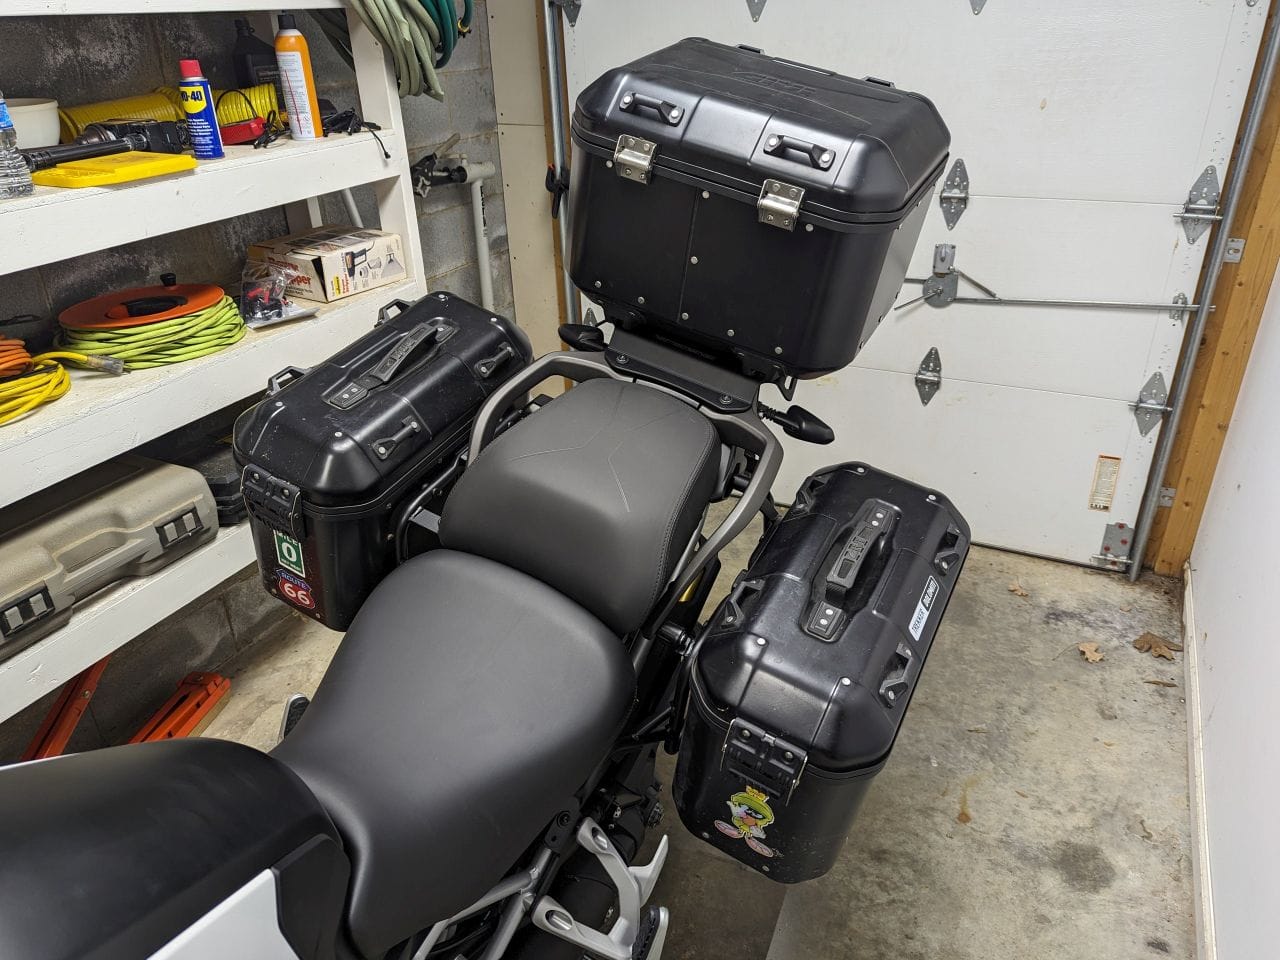
Everything fit correctly. One drawback to the Explorer bike is I have the Givi tool box. I currently cannot install it. I am hoping to be able to make some modifications in order to install it but as you can see, where the box is supposed to go, there is a shock reservoir.

Givi toolkit problem on explorer
Well hopefully I can get that remedied but for today, I am happy that I can again use my boxes.