Givi Luggage Racks for the Tiger 900

In our luggage write up, we mentioned that you need to be very careful when purchasing the racks. Ask a lot of questions as it is very easy to order the incorrect pieces ESPECIALLY when incorporating a top box. There are so many different plates and the part numbers are very similar.
With our Tigers, we got a lot of help from our dealer at Select Cycle. Before we left, they were researching what items we needed for our bikes. They texted us the part numbers and we were able to research and find a great deal (we purchased directly from overseas and with the great exchange rate, got them much cheaper if ordering directly in the USA).
When the racks came it, the first thing we did was layout ALL the pieces and compare to the instruction sheet. FYI, the instructions are like IKEA, ALL pictures no words. Once you have all the pieces laid out correctly, matching the numbers is a bit easier.
First thing I must say is that the fit for these racks was impeccable. Perfect fit right out of the box. You do not need to make any modifications or 3 hands in order to make things fit. Our advice is to loosely fit everything and once it all looks good, go back and tighten it all back down. Ok, a few exceptions. The passenger pegs can be tightened down immediately (remember to use Loctite).
So where do you start? As mentioned before, get a towel/blanket and lay out ALL the parts. We like to take the parts diagram (shown below) and layout all the parts exactly like the diagram.
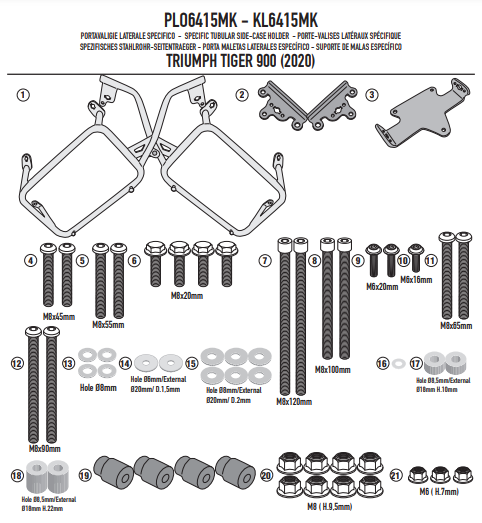
Now when you see the numbers in the instructions (see below), you can easily find the correct screw/nut, etc. Taking a bit of time up front and laying everything our makes it go smoother and quicker (and it lets you know if there is anything missing).
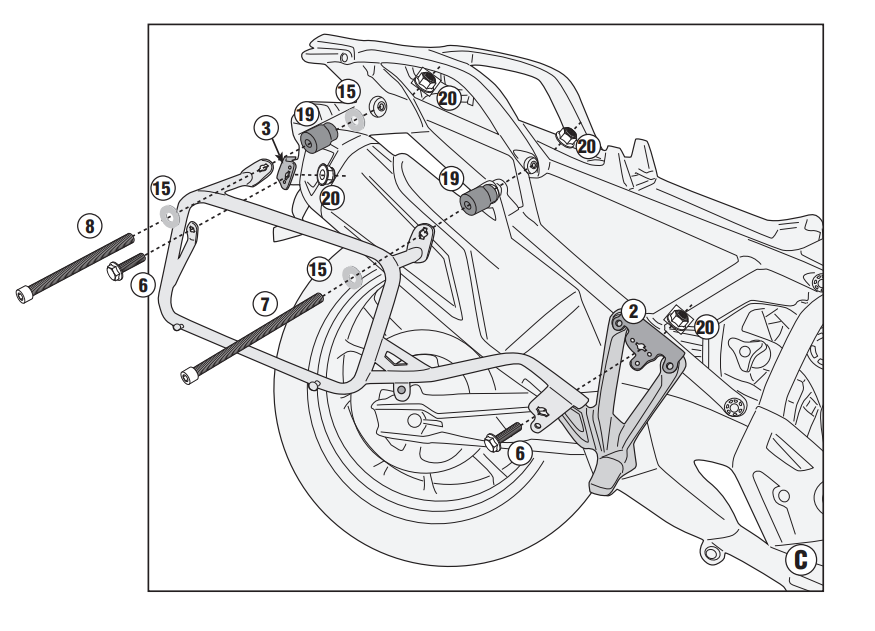
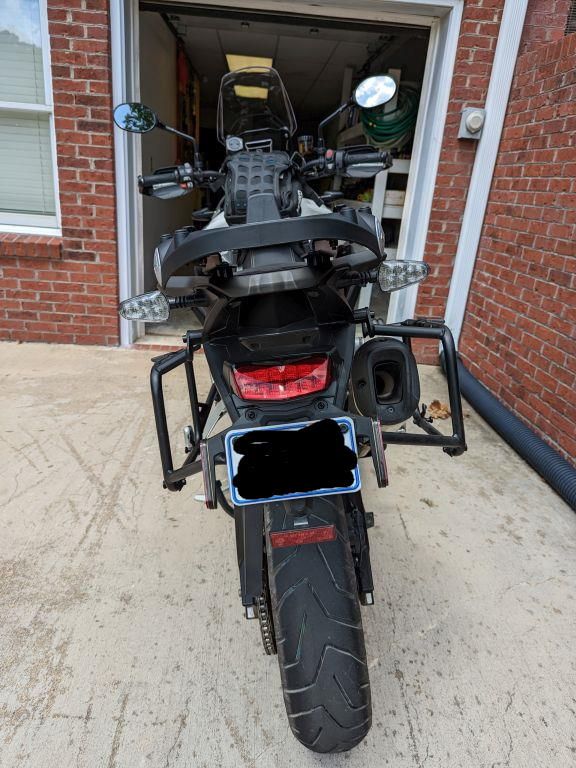
The installation takes less than an hour. You will need some basic tools mainly hex keys, socket, and box wrenches. You will need to remove your seat and the tray since the upper bolts have nuts that you will need to remove (and put back). These are #20 in the diagram. We cannot stress again how simple the installation went. On the Himalayans, it took us hours and hours AND we had to do some electrical work. On the Tigers, take stuff off and put it back. The ONLY thing we have to modify was the plastic license plate holder. The two top mounting holes were slightly too small. With a drill, it can be enlarge in 10 seconds.
We did not have to use Loctite anywhere since all the hardware used nylon lock nuts except on the passenger foot pegs. The only thing we were not able to find out was the torque settings for all the hardware. Use good judgement and do not overtighten.
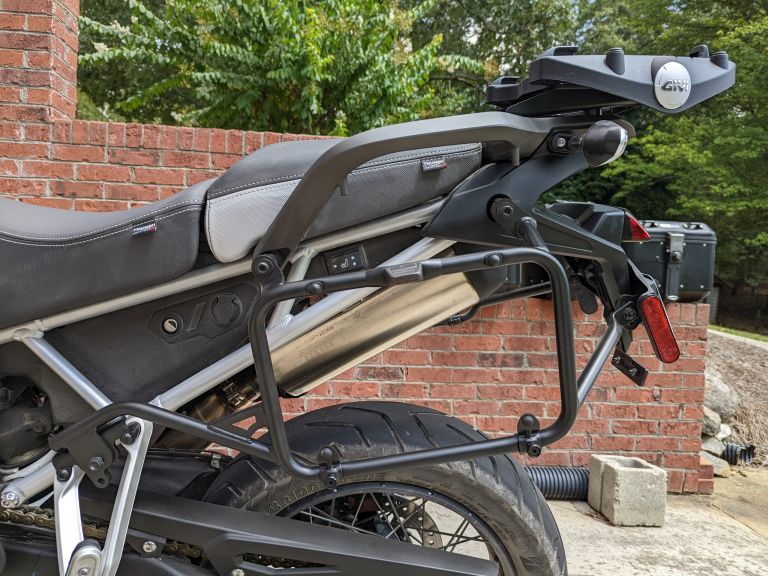
Once all tightened up, here is the end result:

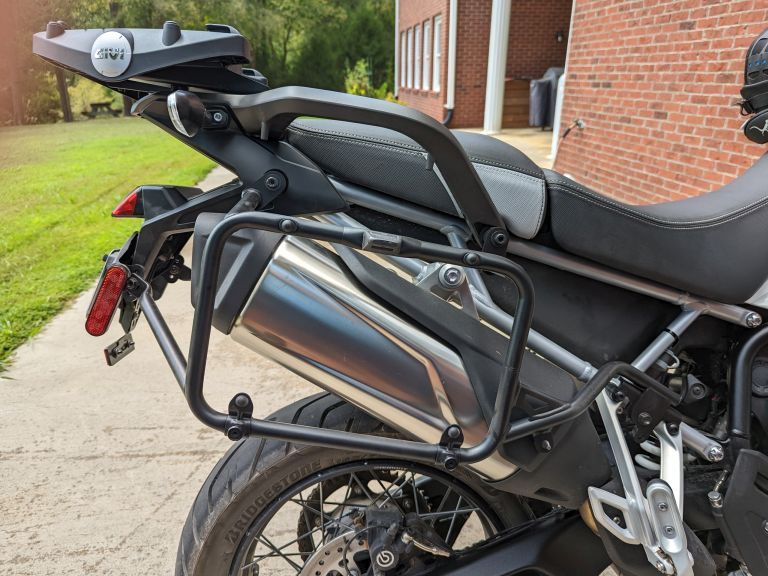
Installed Givi racks
And with the luggage:
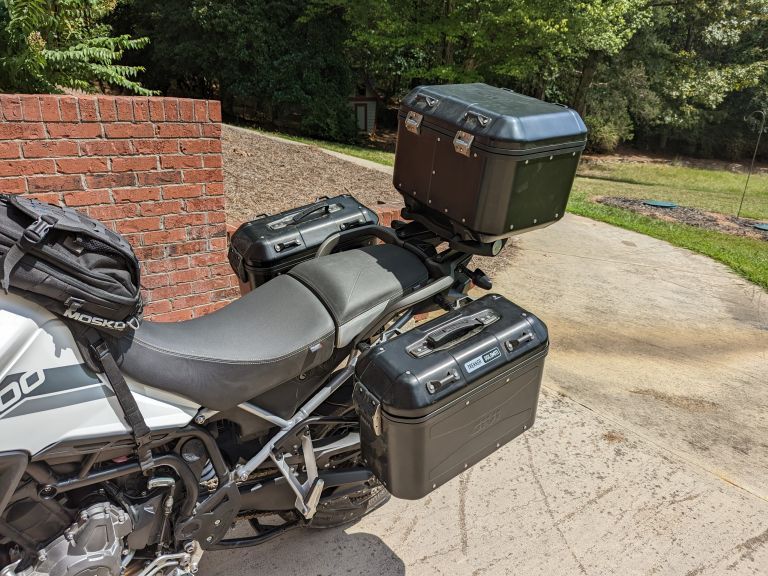
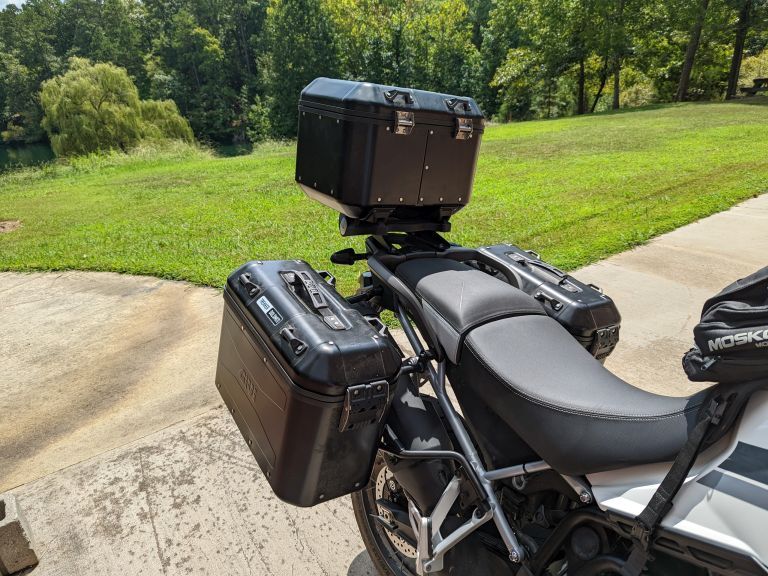
Racks with the luggage
We noticed that the top box does sit a bit higher and also it sits back further. The other noticeable difference (from the Royal Enfield) is the rack covering the muffler stick out approximately two inches further. The is WIDER than the handle bars!
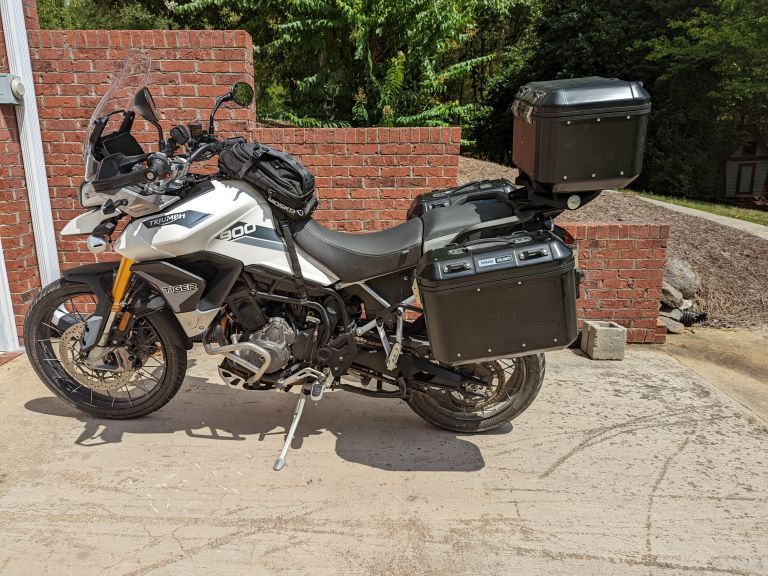
After installing, took them out for a test drive. Did a two hour drive and could not notice them installed. Now I can start going back to the grocery store since I have a place to put my bags.