GCAG Z-Drag Recovery System

Both of us have been talking about getting a recovery system for our bikes just for that one occasion where the bike goes down a small embankment and trying to push it back up is a bit of a daunting task. Luckily up to this point, most spills have been on the road and easy to get the bike back on two tires. The one time one of us got stuck (Scot), we were able to get it going again without too much effort. But with all these small instances occurring, we wanted a bit of help if needed.
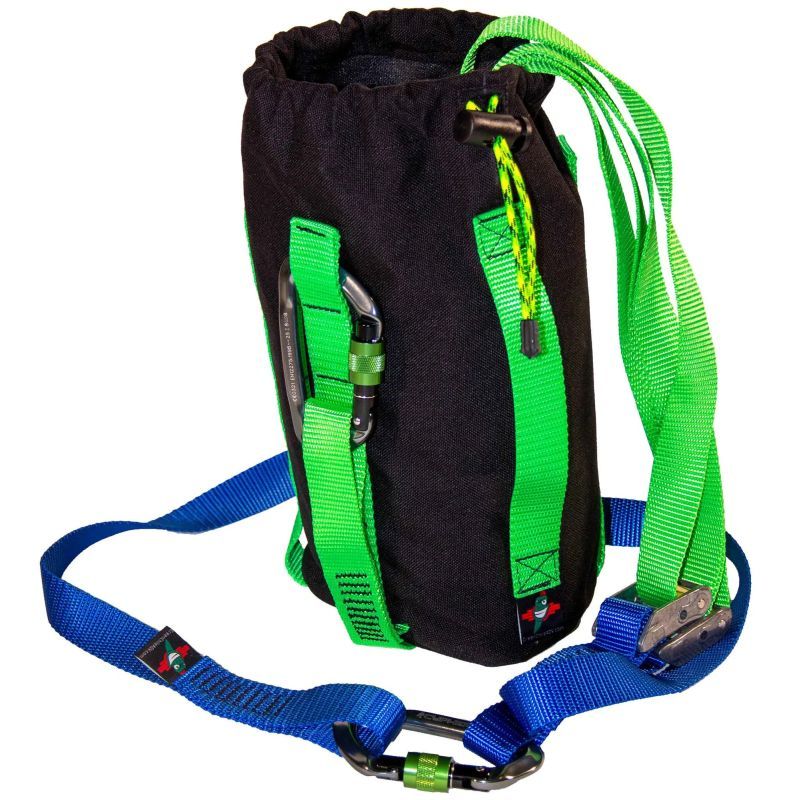
We researched and found that there are not many recovery systems for motorcycles. After carefully reviewing our choices, we decided to purchase the Green Chili Adventure Gear Z-Drag Recovery System. Why did we choose this system? Mainly for ease of use. It is VERY simple and does not require much prep to get your bike "unstuck". Some system require tying knots, attaching pulleys, etc. They may be a bit more flexible in these sytems (such as towing, etc.) but we wanted simple and GCAG Z-Drag fit the bill nicely.
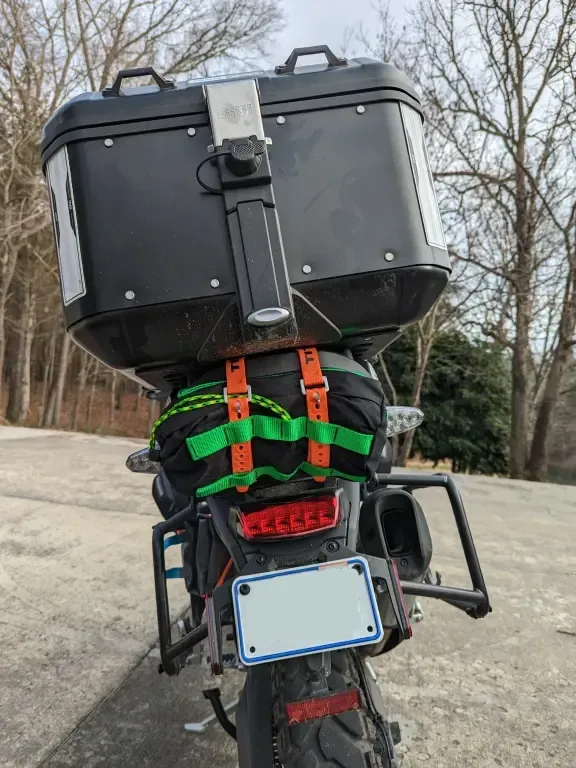
After receiving the gear in the mail, the first step was where to mount it. Again, I do not typically carry my panniers and wanted a place to easily access the kit and keep it secure. After looking at the bike, the rear seemed to be the best location. Using Titan Utility Straps (love these things), the bag is looped onto the rear. It does not touch or rest on the rear fender or block the brake light or turn signals. Also, it is easy to release even if the bike is on its side.
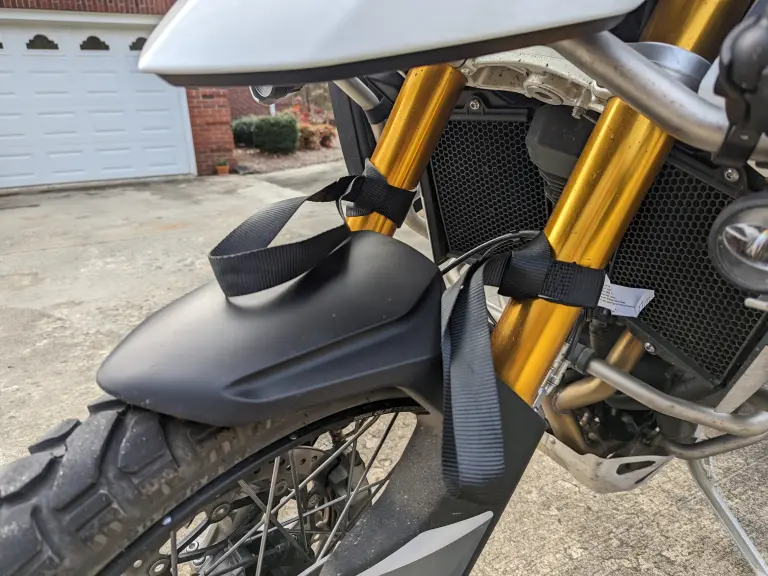
Kirk came over to the house and we decided to give the recovery kit a try. First, we tossed the instructions aside. Why? Wanted to see if this is really that easy to use. Now, before we got started, I did know a bit about this kit. I knew that I wanted to include an additional set of nylon straps to put on the forks where the recovery kit would attach. I do not like the idea of wrapping the GCAG strap around my forks. These additional straps are NOT included in the kit. These are just generic standard tie down loops. I bought a pack of 8 so I can give 4 to Kirk.
So the first step was to attach two of the tie down straps to the forks.
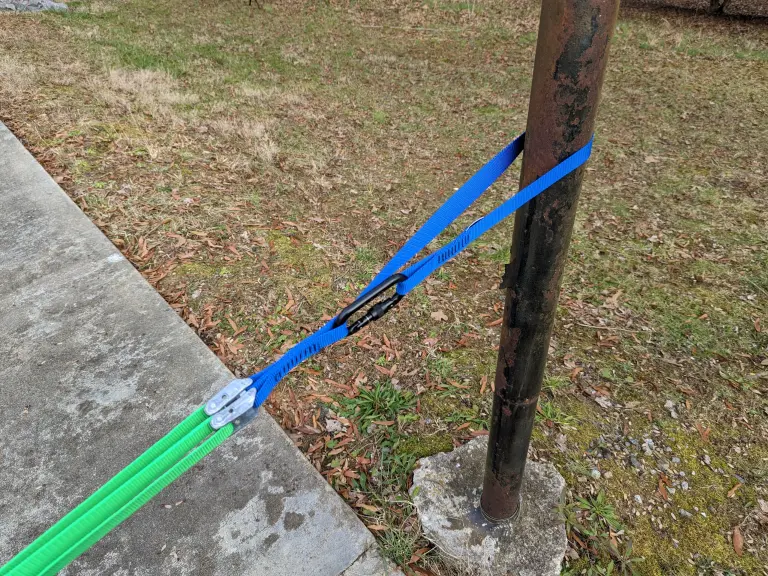
With the straps in place, attach the carabiner (remember to lock it) to the loops.
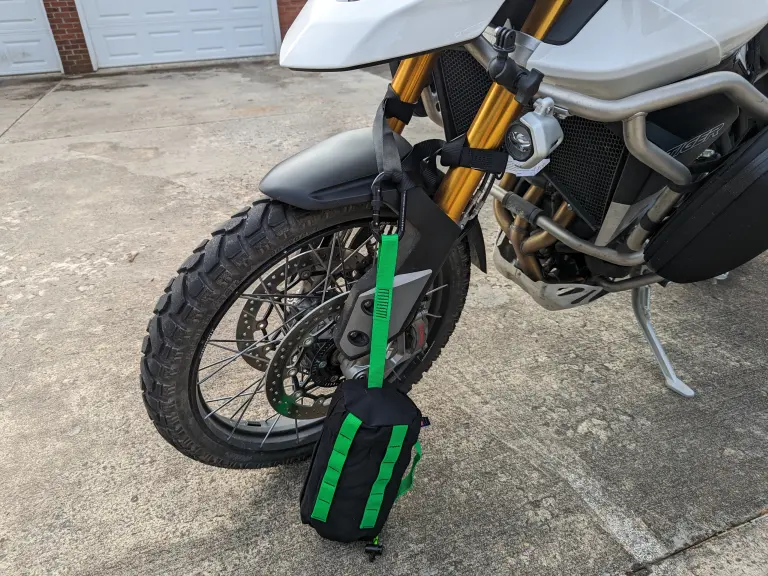
So far, so good. Now we opened the bag and pulled out the contents. Some folks talk about it getting tangled. We did not have any issues and just pulled it out. We grabbed the end and wrapped it around the basketball goal attaching to the caribiner (remember to lock it).
Now we adjusted the slack so we could reach the strap while sitting on the bike.
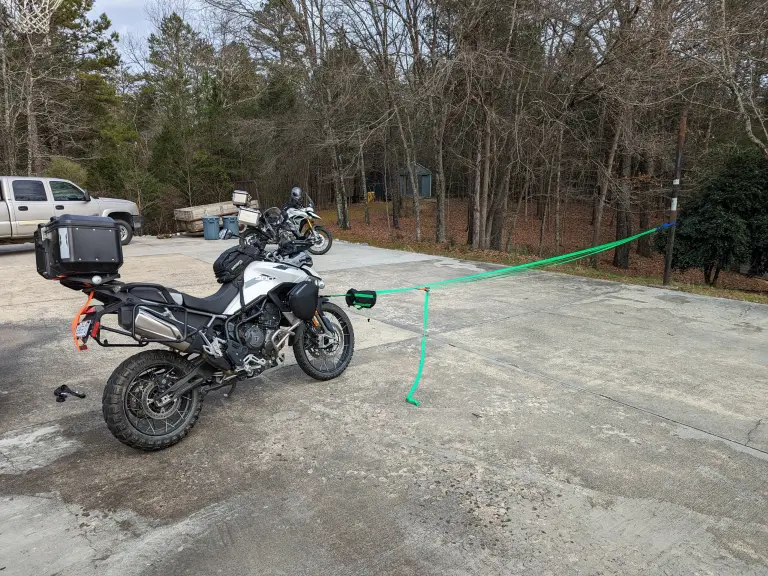
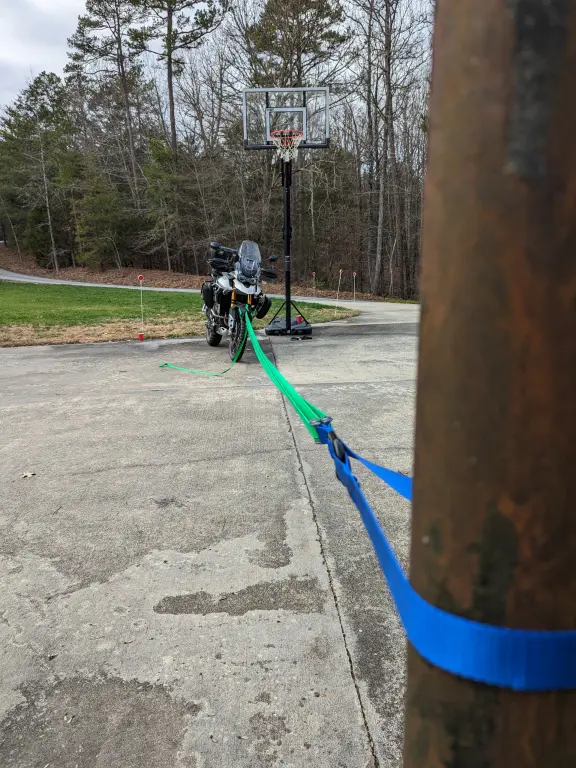
Now came the true test. While sitting on the bike and with one hand, pull the strap. Yes, we are upright and Yes, we are on pavement and it was VERY easy to pull the bike along. So to make things a bit tougher, one of us hung off the back of the bike which simulate about 200+ lbs. of extra weight. Again, the pulley system worked just as expected. Here is what it looks like from the attachment end.
The system is quite simple. There is a cam (near the bag) that is used to take in/out the slack.
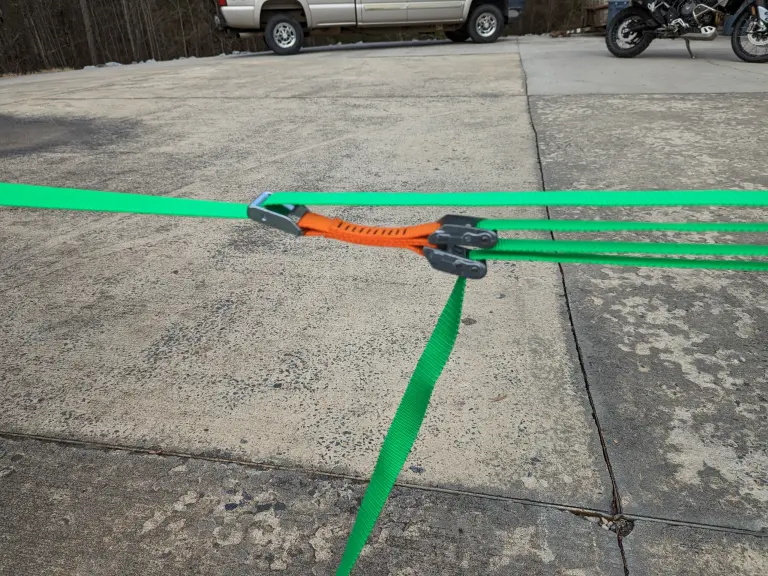
Once we completed our test, we took out all the slack and put it back in the bag. We then did it again as we wanted to see if the straps would get tangled. Nope! They came out just fine and a few twists were straight.
Overall we were both quite impressed with the product. Hopefully this will stay attached to the back of the bike and NEVER have to be used but it is nice to have this as a safety net (if needed).